Testimonial Builder for Wix by VocalReferences
Last Update: March 20, 2022
We thank you for selecting Testimonial Builder to enhance your Wix website. Beyond the incredible display flexibility, Testimonial Builder offers many unique features which will enhance your use of testimonials in general and specifically with your Wix website. Below you will find videos that will help you to get started along with step by step instructions.
For a quick intro check out how to add testimonials to your Wix website in less than 3 minutes.
Videos To Help You Get Started
Getting Started With Testimonial Builder
Importing Testimonials (Google)
Table of Contents
- Creating An Account
- Adding a Testimonial
- Adding a Video Testimonial
- Importing Testimonials from Google and Facebook
- Auto Import Testimonials from Facebook and Google
- Collecting Testimonials From Your Customers
- Editing Testimonials
- Changing the Add Testimonial Form
- Changing The Order Of The Display Of Testimonials
- Accepting Testimonials
- Changing & Customizing The Display Of The App
- Badges
- SEO And Your Testimonials
Creating An Account
The first step in using Testimonial Builder is creating an account. This account is an important one, because it will give you access to all the features that Testimonial Builder has to offer. Also, your settings and selections for our app WILL NOT BE SAVED, unless you create an account for our app.
Your account (email and password) will give you access to our mobile apps and our other features available on our website. Whenever you are prompted to login, use your account information and you will immediately be recognized in whatever feature you wish to explore or use.
Back to Top
Adding a Testimonial

Once you have created an account you are ready to add your first testimonial. To create your first testimonial, click on the Add Testimonial button found on the Main page of our App Settings (as seen above).
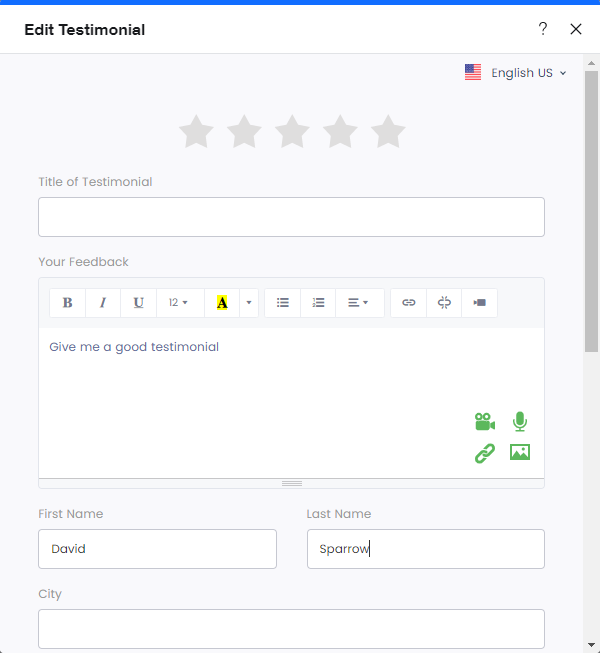
This form will allow you to add specific information about the source of the testimonial, summarize the testimonial in a title, add an image to enhance the display of the testimonial and add the actual testimonial. After hitting Save, the testimonial will automatically appear in the app on your web page.
As a basic user you can add as many testimonials as you wish. However as a free user only the first 2 testimonial will be displayed. If you wish to display more than 2 testimonials, we encourage you to upgrade to the premium version which offers unlimited display of testimonials.
Back to Top
Adding a Video Testimonial
![]()
The form to add a testimonial also allows you to add a video testimonial, audio testimonial and an image. To add a video testimonial, click on the Video Icon from within the Add Testimonial form (as seen above).

After clicking this button the form will access your computer’s camera for you to record a video testimonial (as seen above). Once you save the testimonial, the video will be uploaded to our storage and then to YouTube. Once the uploading is complete (the time it takes will depend on the quality of your internet connection), the video will be displayed in our app on your Wix web page.
Storing Your Video Testimonials in Your YouTube Channel
You can store your video testimonials in your own YouTube channel. To do this you should:
- Go To App Settings
- Click on Manage Testimonials
- Click on Goodies
- Click On YouTube
- Click on Connect YouTube Account Button
- Select the Google Account associated with your YouTube Channel
- Select the Brand Account associated with your Google Account. Most users will have only one Brand Account which is the same as your Google Account.
- Click Allow
- After you click Allow, the App Settings screen will return. Your Google Account should appear on top of the YouTube connect button.
Please see the images below which will assist in visualizing the steps above.
Back to Top
Importing Testimonials from Google and Facebook
In addition to the testimonial review buttons, forms and links, you can import reviews from Google and Facebook. To import:
- Go to App Settings
- Click on Manage
- Click on Import Testimonials
- Click on one of the options to import from Facebook, Google or Yelp. Yelp restricts us from importing more than 3 reviews.
- Follow the instructions after clicking the button.
For a complete review of the import process see the video we produced on the topic.
Auto Import Testimonials from Facebook and Google
As an upgraded user, Vocalreferences will automatically import your reviews from Google and Facebook on a regular basis. To enable this feature:
- Go to App Settings
- Click Manage button
- Click on Goodies
- Click on Auto import and fill out the information on the form.
Collecting Testimonials From Your Customers
The easiest way to collect testimonials from your customers is to enable the “Add Testimonial” button in the app settings. Add Testimonial Button settings can be found in the App Settings under Settings.
Once the button is displayed then the “Add Testimonial” form will appear when the visitor clicks on the button. After the visitor records their testimonial (text or video), the testimonial will wait for your approval with in the Manage Testimonials section.

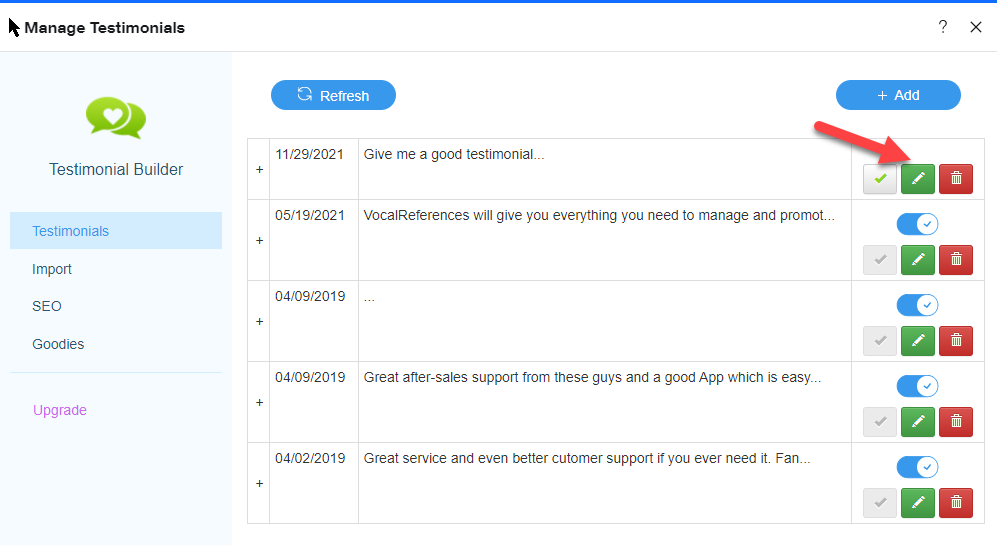
To accept the testimonial, simply click on the green check mark and the testimonial will be displayed in our app on your web page. If you wish not to display this testimonial either delete the testimonial or do not click on the green check mark.
Testimonial Request URL
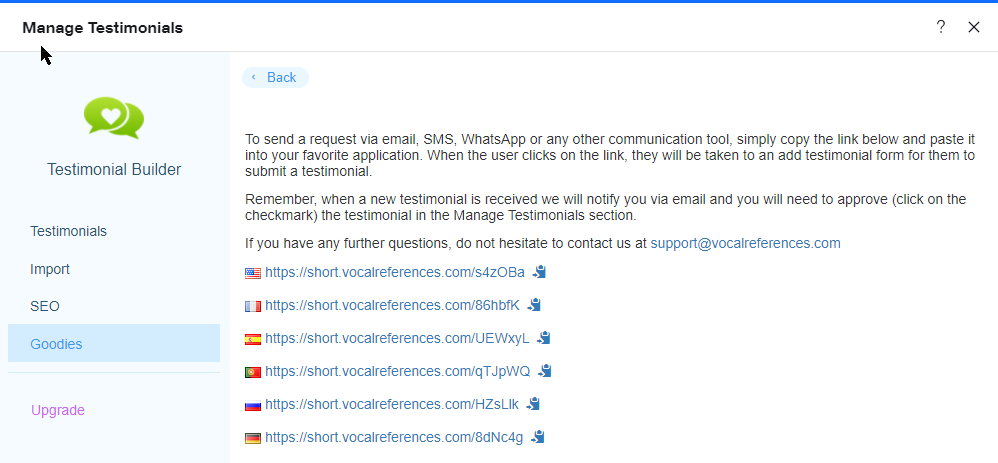
Another option for collecting testimonials from your customers is to use Testimonial Request URL’s. Every account is setup with unique URLs that you can embed in buttons or images. The URL acts in the same way as the testimonial button. When someone clicks on the URL or a button associated with the URL, the Add Testimonial Form will be presented.
To find your unique Testimonial Request URL’s
- Go to Manage Testimonials
- Click on Goodies
- Click on Request URL

Editing Testimonials
Often you may receive a testimonial which either written poorly or needs a minor adjustment to make it readable. For this reason we have made it possible to edit a testimonial.


To edit a testimonial, go to the Manage Testimonials section and click on the pencil. After making the edits, click Save and the changes will be automatically reflected in the app.
Back to Top
Changing the Add Testimonial Form
The Add Testimonial form comes in two basic formats: Full and Basic. Full will display all the fields available and Basic will display a subset of the fields. If you wish to customize the form you can upgrade and decide which fields to display and in which order.
Changing The Order Of The Display Of Testimonials
The testimonials are displayed in date order. When you upgrade your account the app will display the testimonials in descending order with the newest testimonial first. To adjust the order of the testimonial, edit the testimonial and change the date. After the change is made the testimonials will be displayed immediately in the new order.
Back to Top
Accepting Testimonials
(or Why testimonials that are left by my customers are not showing up in the app display)

Any testimonial that comes from a visitor to your website is automatically flagged as pending. This pending status allows you to view the testimonial prior to it being displayed on your web site.
To accept the incoming testimonial go to the Manage Testimonials section and click on the green check mark to accept the testimonial or click on the garbage can to delete it. As soon as you accept the testimonial, the testimonial will immediately appear on your website.
Back to Top
Changing & Customizing The Display Of The App

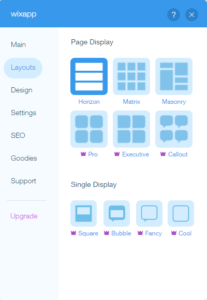
There are many layouts and options available to you to display your testimonials. To change the overall layout of the testimonials,
- go to the app settings,
- click on the Layouts and
- then select the layout which is most appropriate.
Within each layout there are further options which you can find under Design and Settings that you can customize the layout to meet your website’s specific needs.
To change any of the specific layout options, go to the App Settings, click on Design and then make the changes that you feel are appropriate.
Some of the layout options are uniform across all layouts such as the adding and configuration of the “Add Testimonial” button. Others are specific to a layout.
To change one of the common options go to the App Settings and then click on Settings. The Settings area is where you can select the common display options of the app.
Back to Top
Badges
Testimonial Builder provides you with three types of badges to enhance your website; Recommended Merchant Badge, Social Ratings Badge & Reviews Summary Badge.

The badges can be found in the Add ons section of our App Settings as seen above. To add any of the badges to your site, simply click the Add to site button and follow the instructions.
Back to Top
SEO And Your Testimonials
One of the most popular features of Testimonial Builder is what we do with your testimonials to further your SEO (Search Engine Optmization) efforts. In addition to the Wix SEO, Testimonial Builder provides a number of additional features which will improve how you get found on Google.
Showcase Page
Every account comes with a unique showcase page which highlights your business information and your testimonial, as seen below.

In addition every testimonial is marked up with review html and then submitted to Google for indexing. As a result, Google will produce a unique review SER (Search Engine Result) which will highlight your star ranking (which is hopefully 4 stars and above) and the number of testimonials you have received. This is all dependent on Google’s own algorithms which we have no control over.

In addition we make use of your business name and your keywords to build a unique URL for your showcase page. It is well documented that Google uses the url as a strong factor in determining a page’s relevance to a search term.
Business Profile
For this reason we take your business name and your keywords and include them in a unique URL which will lead the searcher to your showcase page of testimonials. This has been proven to be an effective way to drive traffic to your business online.
We encourage you to complete your business profile and your SEO keywords to further enhance the SEO functionality of our product. You can find these settings in the Goodies Section under Manage Testimonials as seen below

For this reason we encourage you to upgrade and to fill out your profile and your SEO keywords. You can do this from within our App Settings under the SEO section.


